
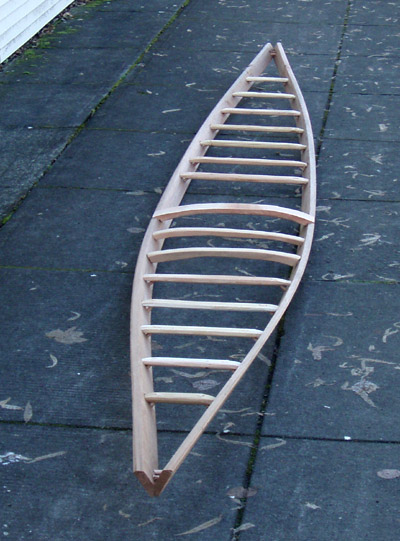
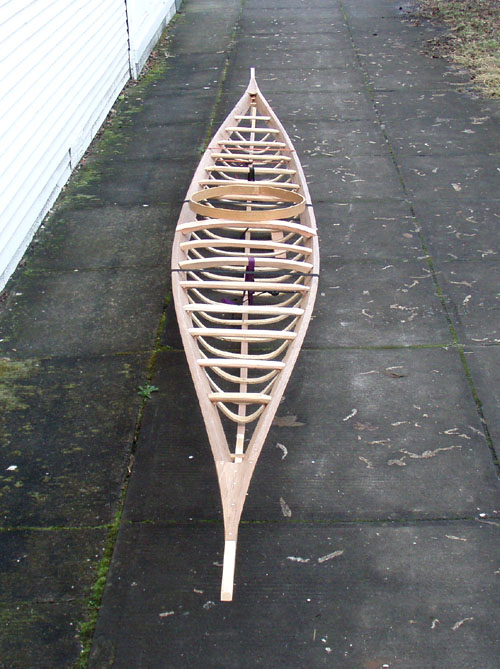
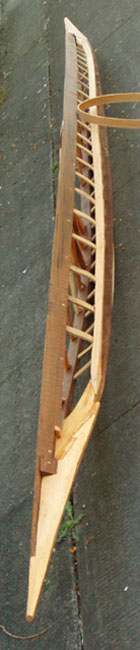
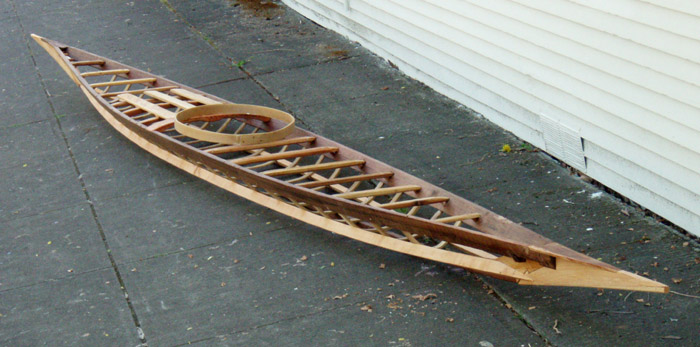
The finished frame, April 2009.
Replica East Greenland Kayak Project Photo-Journal
--based on the no. 48057 at the Museon, Den Haag--
This is the second replica of this kayak that I've built. I built the first one in 1998, just a few months after
I surveyed the original kayak in the Netherlands. The lines of this kayak are published in "Kayaks Of Greenland"
-- plate 87 and pages 421-423. This kayak measures 19'3-3/8" long and 19-1/8" wide.
The finished frame, April 2009.
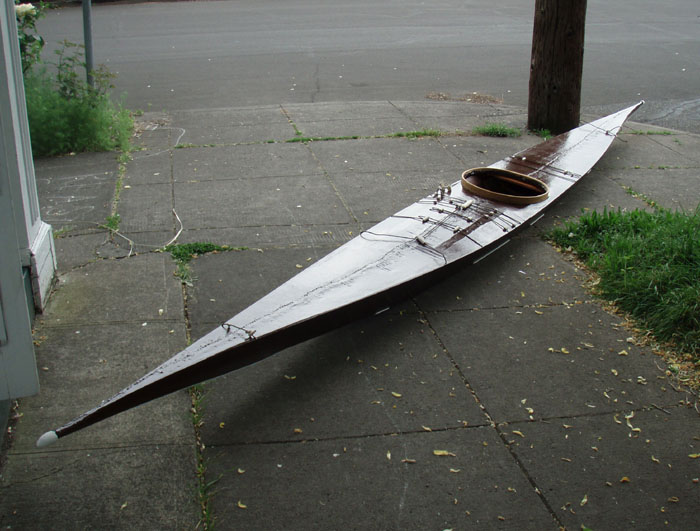
The finished kayak, June 1st, 2009.
The following is a photo-journal of the construction process. Construction began in January of 2009.
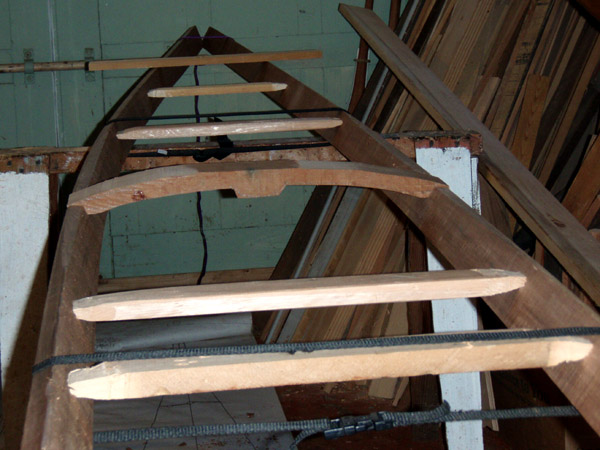
Rough-fitting and shaping of deck beams.
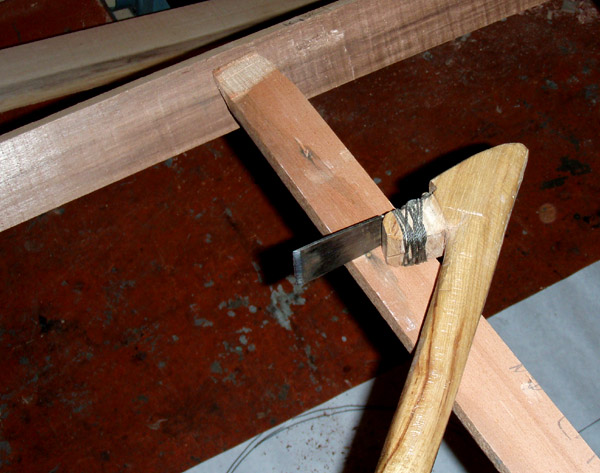
An adze is the perfect tool for chamferring down the deck beam's ends into suitable tenons.
All the deck beams are in-- nothing fastened yet.

The gunwales and deck beams.
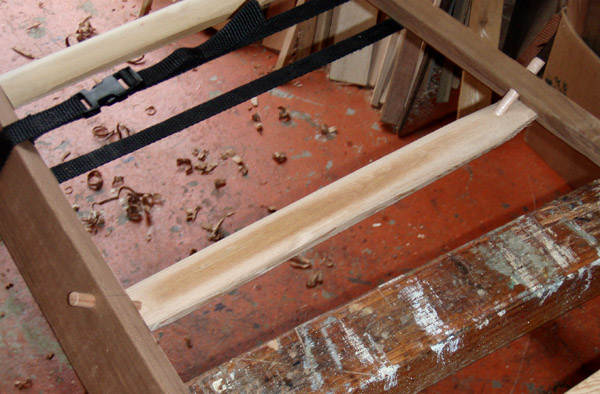
Oblique-set pegs fasten the deck beams in place.
The completed top frame: All joints are pegged (nothing lashed).
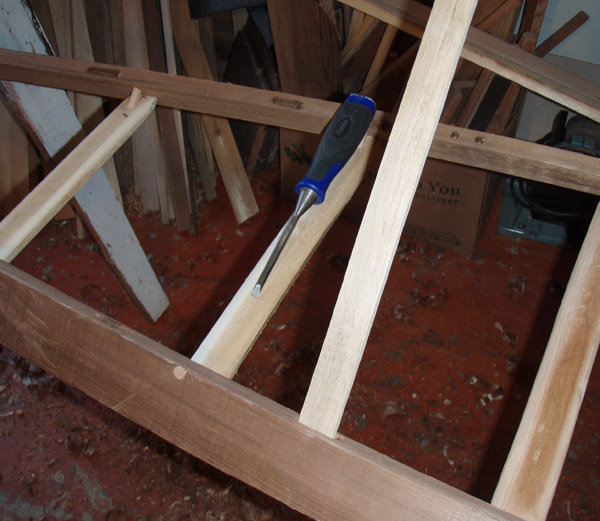
Next step is to drill and chisel the rib mortises. Note the drilled-but-not-yet-chiseled
rib mortise on the upper right.
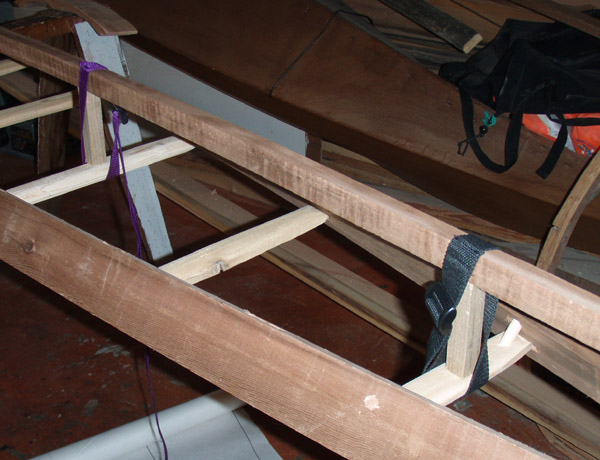
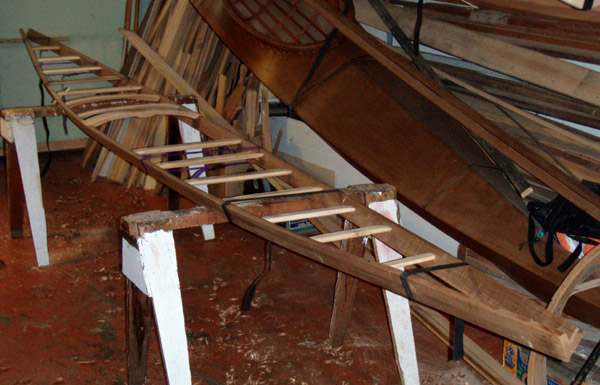
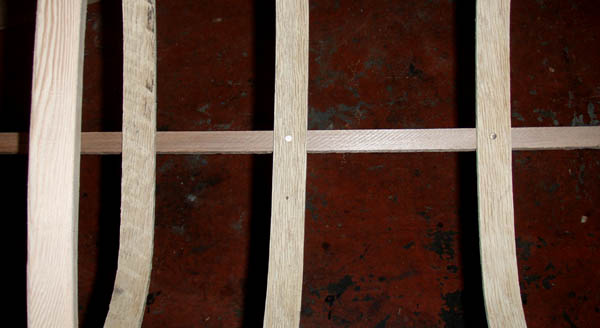
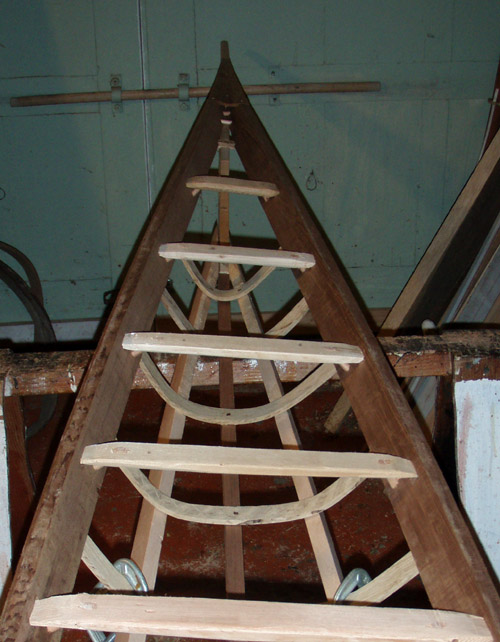
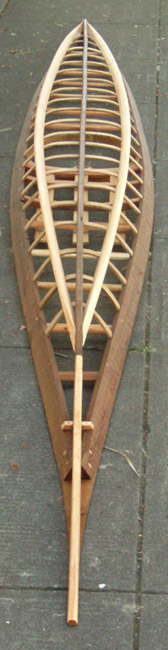
Before inserting the ribs, I stanchion out the keelson so the proper depths are
set. I bend the ribs under the keelson.
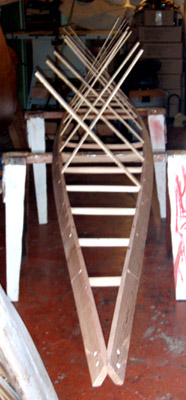
White Oak + Steam= Bent ribs! All 20 in place within an hour. The project
now moves from a taper-ended ladder form to an entity of depth and volume.
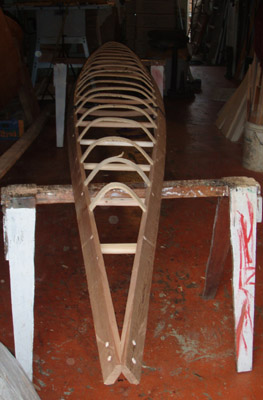
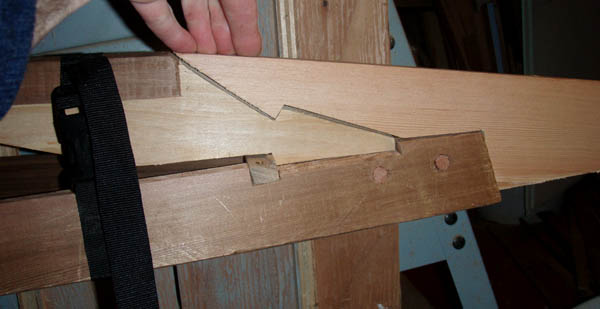
With the ribs in place, it is now time to make the keelson ends. These pieces join the
keelson to the gunwale ends, and will be scarfed onto the keelson ends. This image
shows the laying out of the proper shape of the stern keelson end.
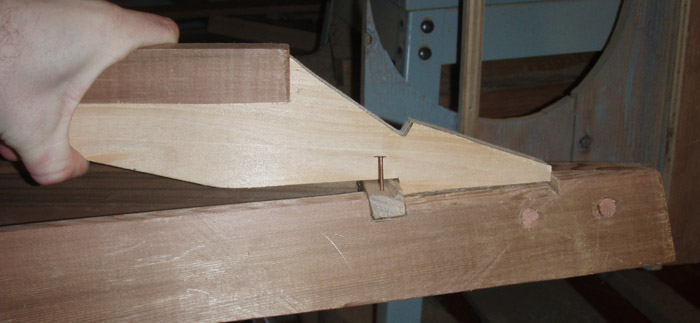
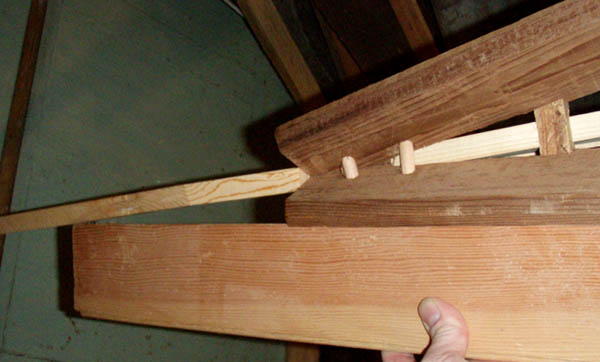
This is the stern keelson end in place. I had to inset a small cross-piece in order to
hold the keelson end in place (to prevent it from sliding forward).
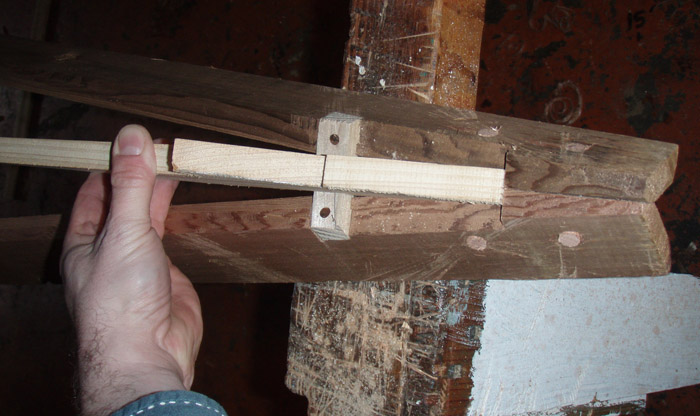
This shows the cross-piece and gives a better idea of how it functions. If the gunwales
were closer together at this point, the cross-piece would be unneccessary.
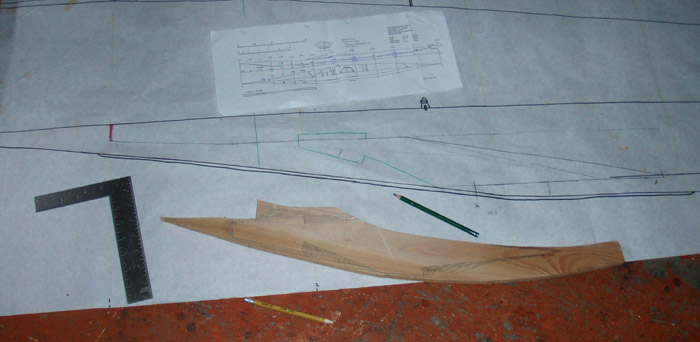
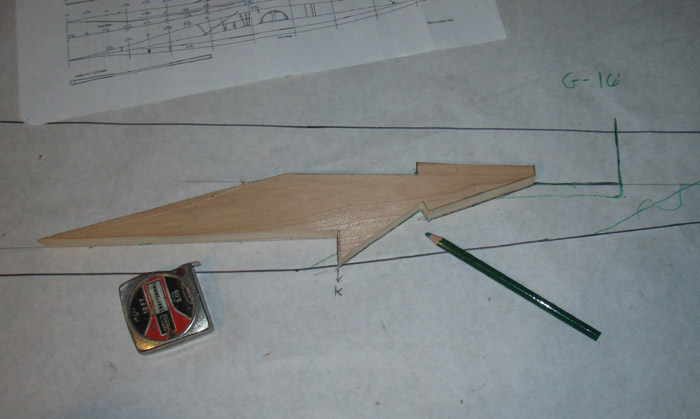
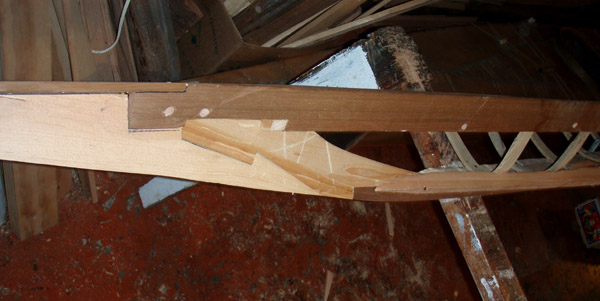
Here is the bow keelson end, as marked out on a board. Full-size loftings make this
patterning and planning quite easy.
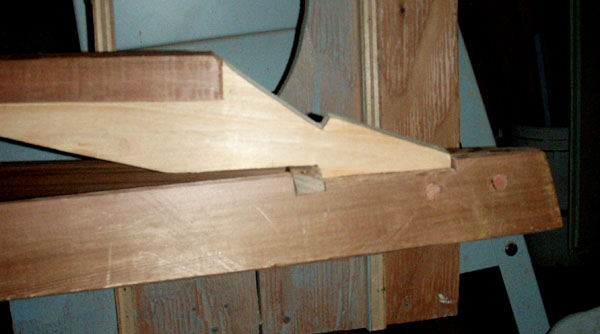
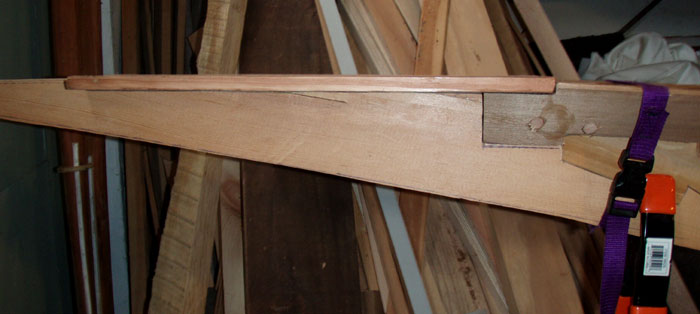
The stern keelson end, as fitted to the gunwales. When the bow keelson end is fitted,
there has to be enough slack or tension in the keelson to spring the gunwales to the
proper sheer. I glue-scarf the keelson to one of the ends, and then flex the
gunwales to their proper sheer, and mark where the keelson should be
cut and glued to the other keelson end. Its sort of like stringing an archery bow....
Once the sheer is set and the keelson ends are attached, the ribs are nailed to the keelson.
I use anything from galvanized roofing nails to bronze ring-shank.
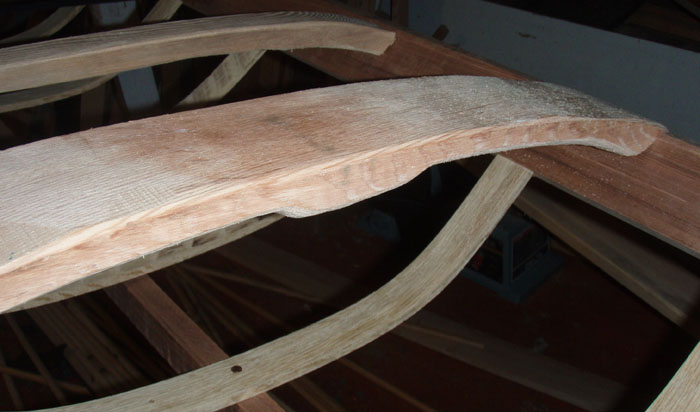
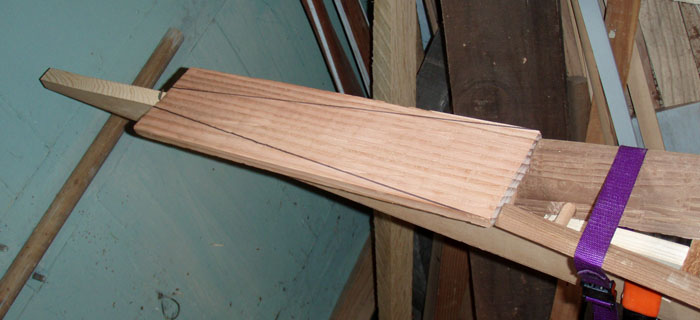
At this point I took some time to shape the masik, which is the forward cockpit deck beam.
The first photo on this page shows the rough-sawn masik, but here it has been smoothed
and worked down to a proper shape. Note the thicker mid-section.
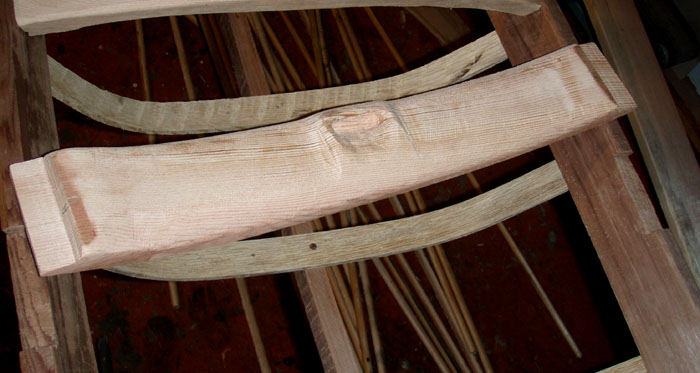
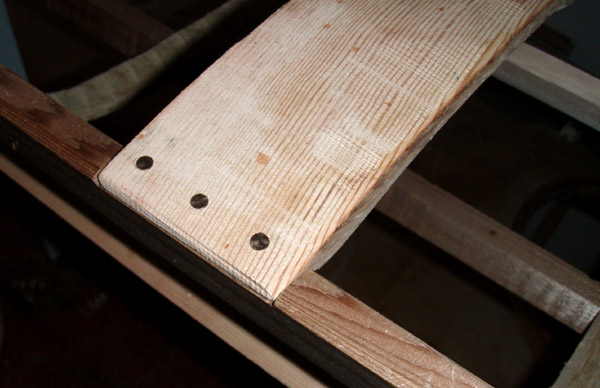
This is a view of the bottom of the masik. The thickened mid-section is actually a grip
for the paddler's fingers: This grip is used to pull one's self into the kayak. Note how
the masik is rabetted to the top of the gunwales. This is NOT a traditional East Greenland
method of attaching the masik-- It would normally be mortised and tenoned like the
rest of the deck beams. I mounted the masik this way in order to gain a bit more
clearance for the paddler.
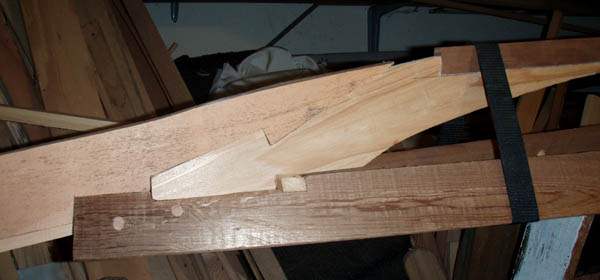
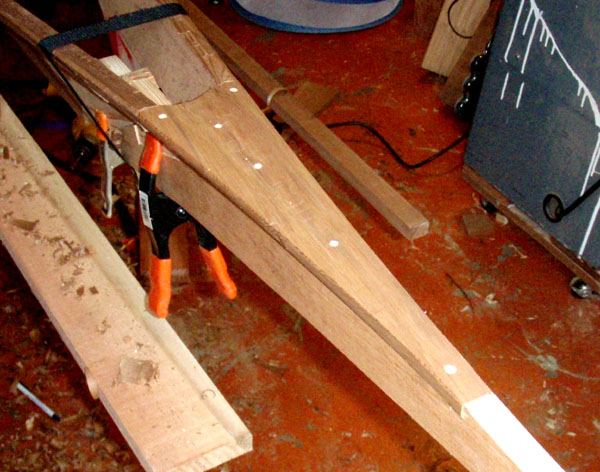
Now the stems are cut and fitted-- they too are patterned off of the full-size
scale drawing in order to get the proper shape and fit. This is the bow stem.
All of the outer edges of the pieces are left oversize to be planed down to
proper shape and depth later.
And here is the stern stem piece. With the stems in place, this kayak now has
a length of over 19 feet.
A horizontal 'cap-piece' or plate will be rabetted into the top of the gunwale ends
and the top of the stem boards. This plate will ensure fair lines and strengthen the
critical are between the stems and gunwales. The photo above shows me
sighting the course of the sheer (on the gunwales) and observing where
the 'line' lands on the stem board.
Here's the cap in place-- marked out for a rough cutting. Once it is nailed in place I'll fair
its edges to blend smoothly with the stem and sheerline of the gunwales.
A side view of the above cap-piece showing how it is set into the stem and gunwale ends.
The fitted, faired, and finished cap. Note the hollowing on the cap's topside.
Starting to look like a real kayak-- a distinctly East Greenlandic one.
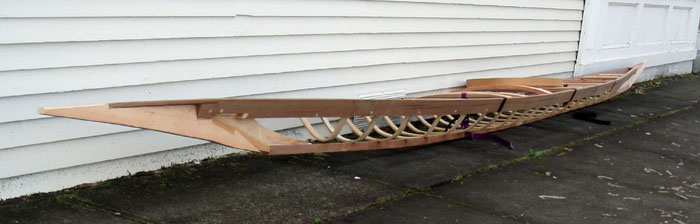
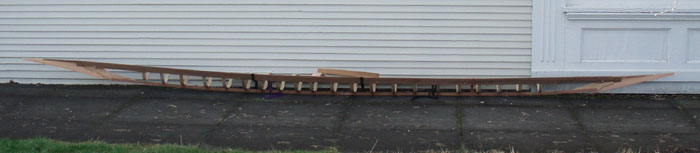
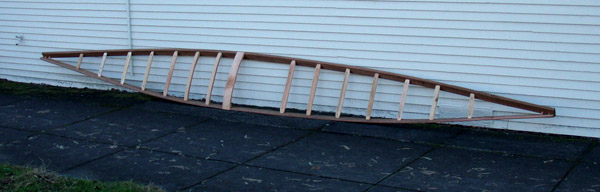
Two side views showing its sublime sheerline and how it levels off towards the ends.
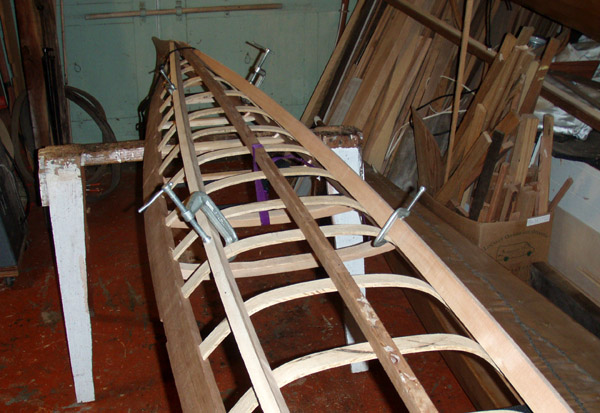
Next, the chines need to be placed and fastened. Here they are clamped in position, waiting to be nailed to the ribs.

At the ends, the chines are nailed to the sides of the kayak's stems. Here is just a rough
cut to remove extra length of the chines. Next, I will saw the inboard faces of the chines so they
meet flush with the stem.
The chine ends are flush with the stems and are nailed in place.
Here is a side view of thebow showing the chine-end nailed to the stem. Its also a
good view of the ends joinery in general. Note how the line of the keelson has been planed fair and smooth.
(For reference, the progress to here is dated March 31st).
At this point I nailed the masik to the notch in the gunwales' top edges. Because the masik
used here is of the West Greenlandic form(providing more room), I've used a W.G method
of fastening the masik.
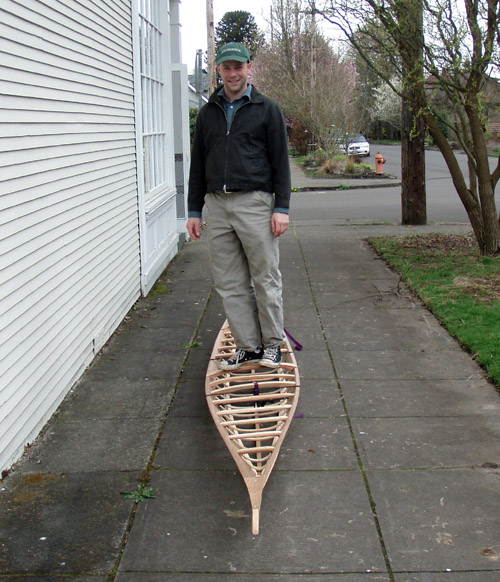
Is the kayak strong enough to . . . . . ? Yep.
The builder standing on the masik.

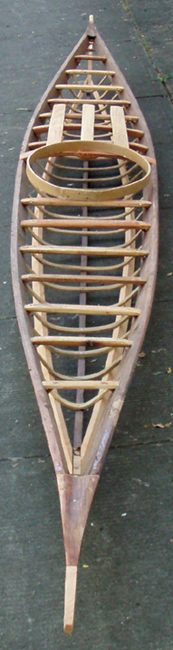
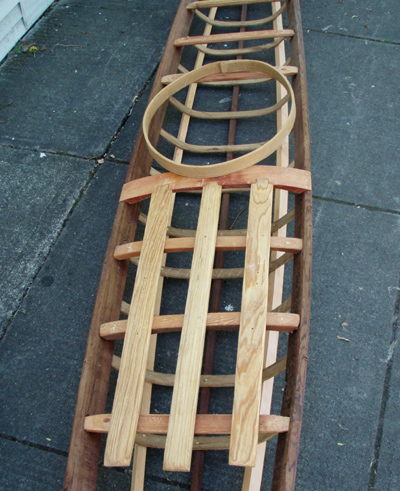
Now the kayak's three forward deck stringers are attached. Their aft-ends rest in notches
carved into the masik's forward edge. From Right-to-left: Marked, carved, and fit.
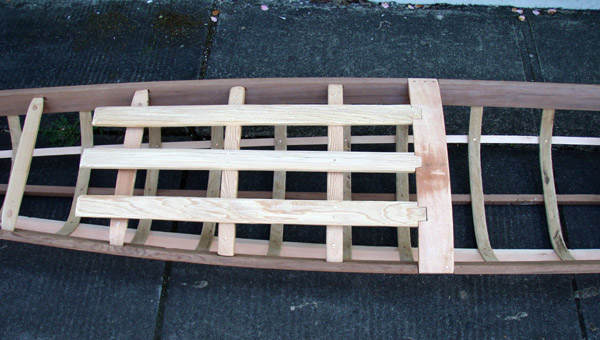
Here's a view of the completed foredeck. The stringers are pegged to the deckbeams.
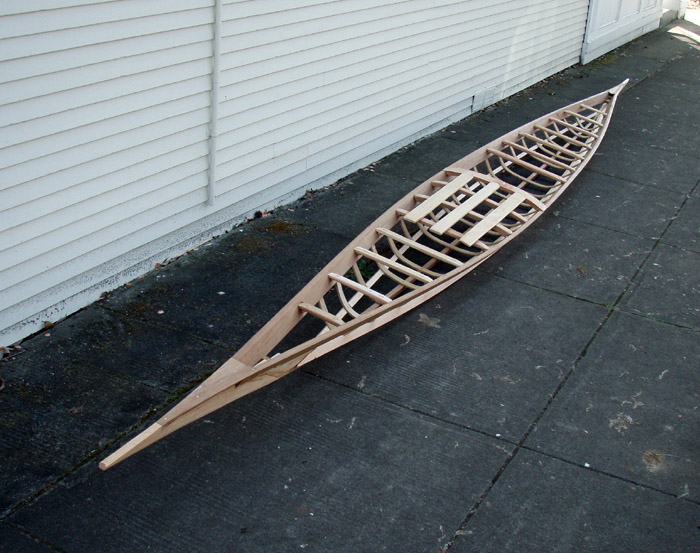
At this point, the frame is pretty much completed & ready for oiling-- more pics of the frame to follow,
as they always look much better with the oil on.
Oiled!
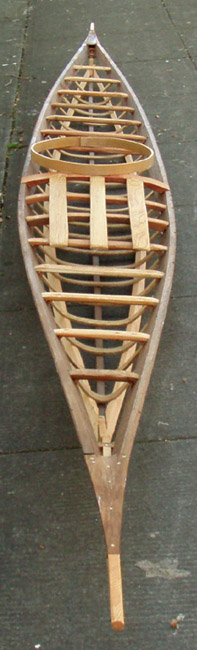
Foredeck view, with coaming in place.
Rear quarter view.
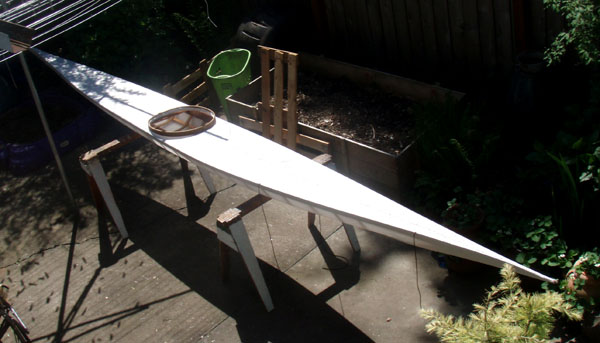
Now comes the point where I cover up the beautiful oiled wooden frame with
some ugly bright white cloth. The cloth is an 8 ounce nylon and once the kayak is
all completed you (hopefully) won't miss the frame at all.
Above is an upright-view of the kayak's stern. This stitching up the tip and down the
deck an inch is the first sewing of the cloth. After this,a similar stitch is made an
inch or so behind the bow tip. . . . then the clothis pulled and stretched such that
the bow stitching is hooked over the bow.
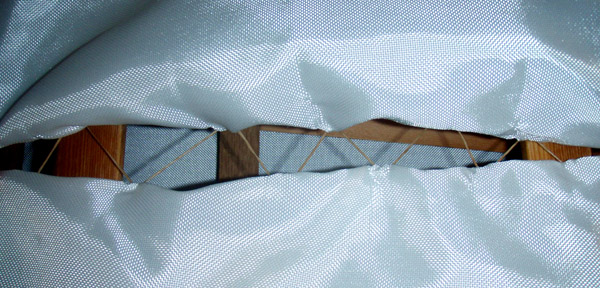
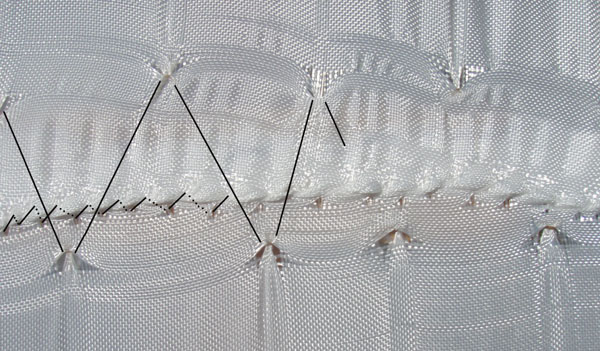
The next step after stretching the cloth length-wise is to stretch it around the hull,
tranversely (circumfrentially?) Above shows an inside-the-cloth view of a
zig-zag line that laces up the kayak like a shoe. This tightens the skin up
considerably.
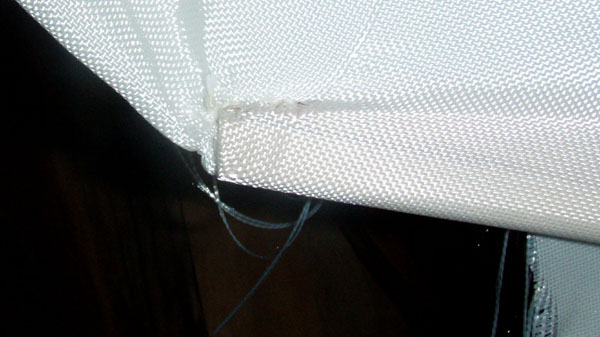
Where the kayak is too narrow to effectively place a zig-zag line, I whip-stitch the
cloth to get it tight. This is the final stitching at the kayak's ends. This is
done with a curved needle, as is all the sewing and lacing.
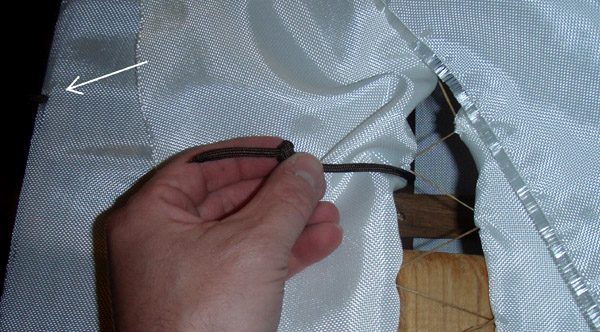
Before the deck receives its final stitching (after the zig-zag), I insert the deck-
lines that I would be unable to reach after all the sewing. Here I'm holding the
knotted inside-end of a line. This line exits the gunwale at the white arrow
on the left.
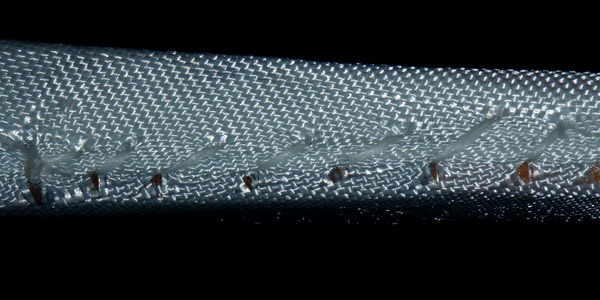
Here's a view of the finished stitching-- highlighted on the left to show the course of the sewing.
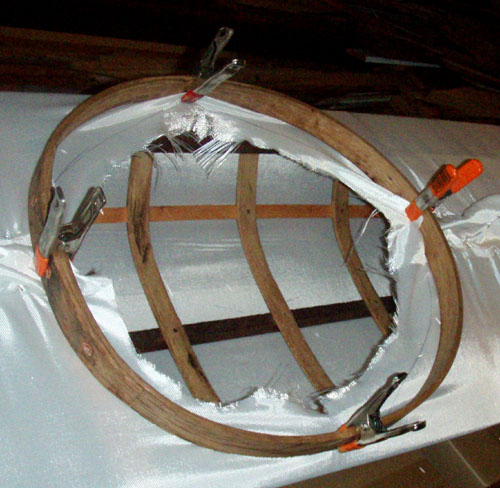
At this point the coaming needs to be attached. Here it is held in place with clamps.

These are the tools I use to tack the kayak's cloth to the upper inside face of the coaming. I use aluminum upholstery tacks with their knife-tips clippd off. They are clipped because they will bend around instead of penetrating the oak coaming. ...If they do make it into the oak unclipped, they are long enough to go all the way through the coaming. The pliers on the left push the tacks into the oak.
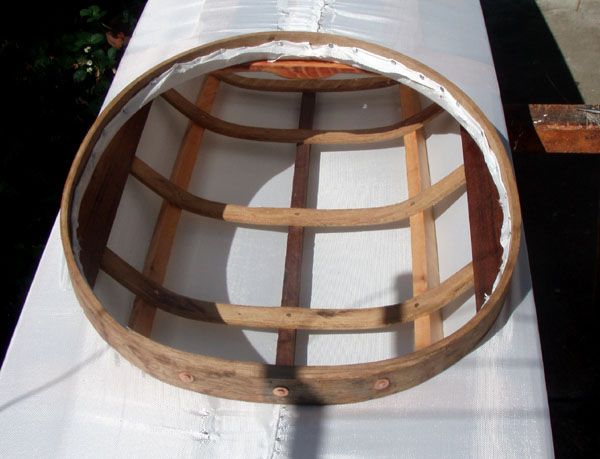
Here is the completed coaming. Note the tacks securing the cloth to the coaming. Also, you can see the three large copper rivets used to scarf the coaming. This joint is also glued with polyurethane glue.
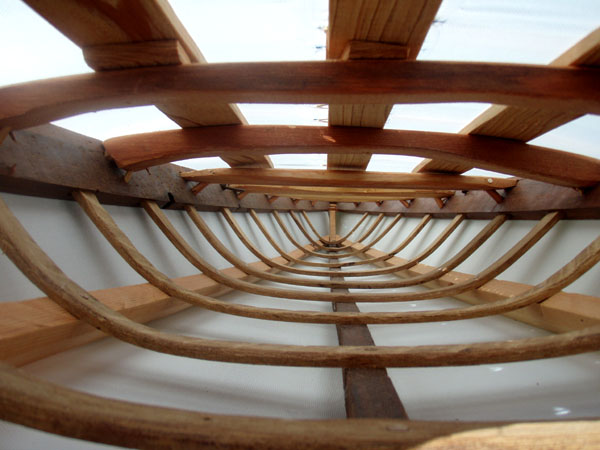
Now the kayak is ready for a waterproof coating. Here are some interior pictures before the coating darkens it all up. Above is a bow-view, and below and aft view.
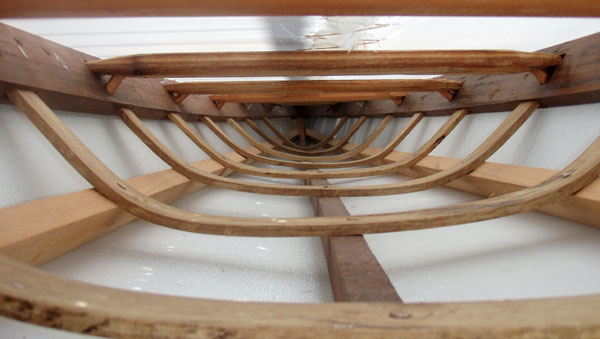
Ready for coating!
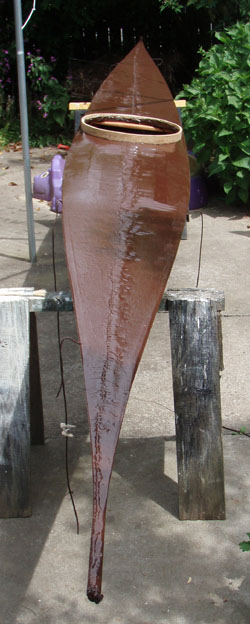
The coated kayak. I used Coelan pigmented with Coelan brand "mahogany."

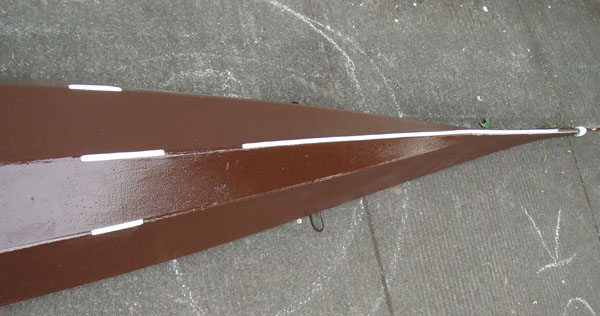
Next step is to attach keel edging. The original edging was ivory; I use oak (painted white). The edging is pegged to the keelson and chines with bamboo skewers.
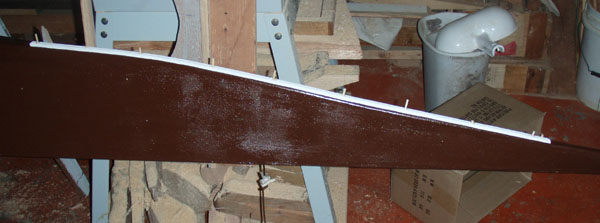
Side view of the edging at the bow.
This view shows the edging at the stern on the keelson and chine. Also notice
the oak knob protecting the kayak's stern tip.
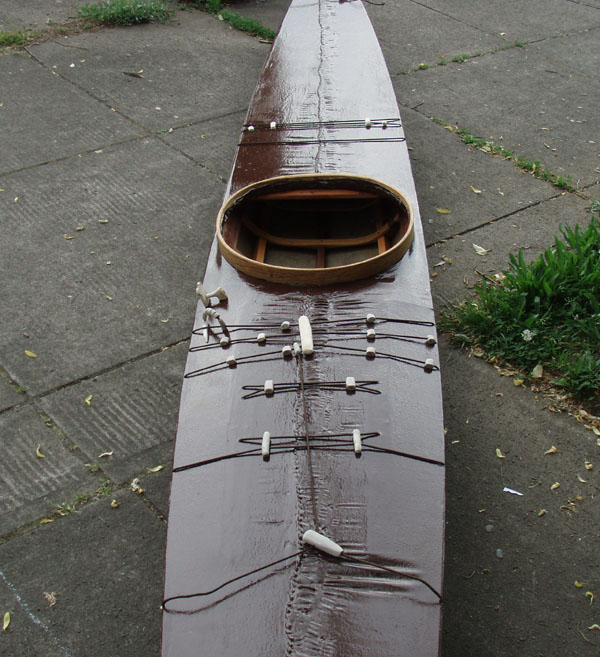
Here is the kayak with all the deck lines and fittings in place. East Greenland kayaks
are typically very well endowed with ivory buttons, sliders, hooks, dead-eyes, and what-not. I used
deer antler for the fittings and parachute cord for the lines.
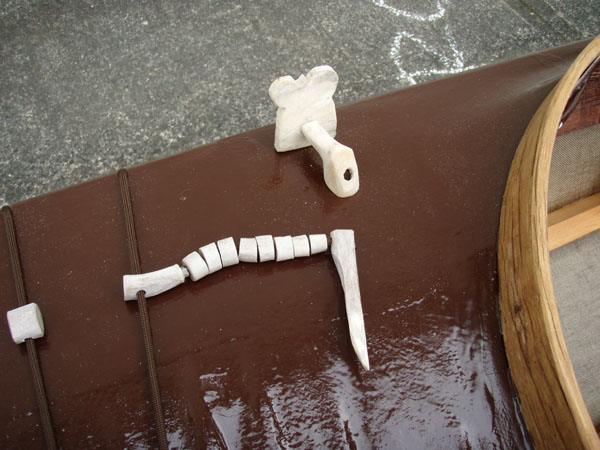
This is the kayak's harpoon holder (top), and harpoon leash-- both distinctly
East Greenlandic in form and function.
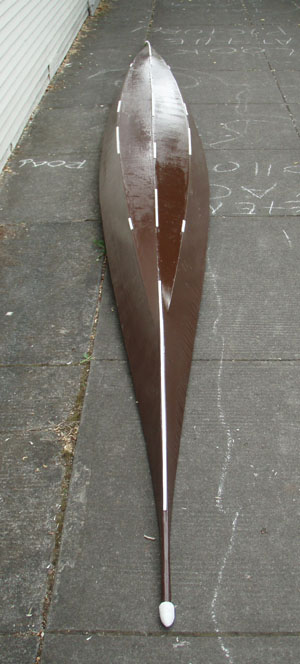
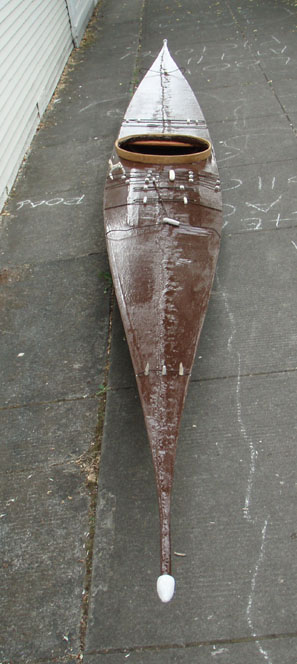
Bottom and deck view of the completed kayak.
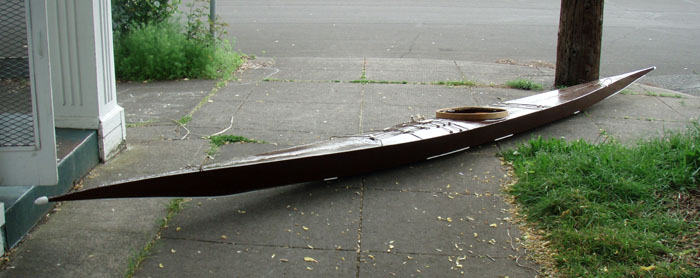
A low side view of the completed kayak.
THE PADDLE: A replica of the original paddle associated with this kayak....
![]()
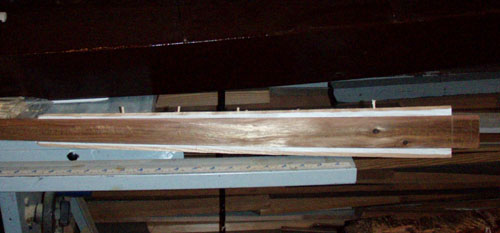
This is the paddle blank. Its a tiny piece of Western Red Cedar milled
to the length width and thickness of the original.
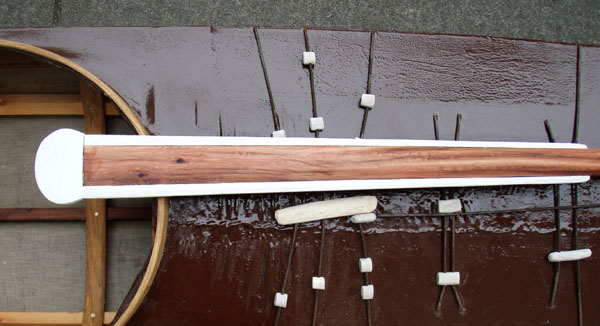
Here the blade edging has been attached. The original edging was ivory, but I've
substituted hardwood (ash), painted white. The edging is pegged in place with
bamboo skewers.
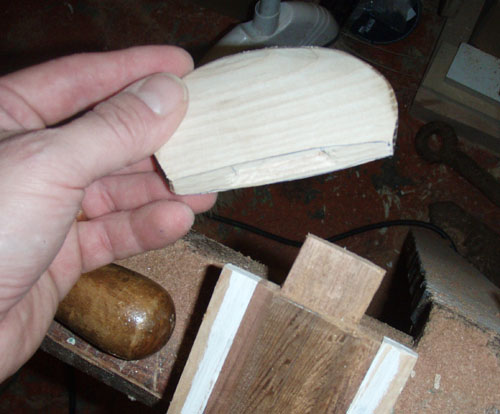
After the edging is fastened, I attach the paddle tips-- again, ivory or bone on the original,
but hardwood here. Notice the tenon end on the cedar blade; this tenon will
fit into a mortise carved in the base of the tip. The joint will be fastened with a
transverse peg.
The completed oiled paddle. (I use Linseed Oil).
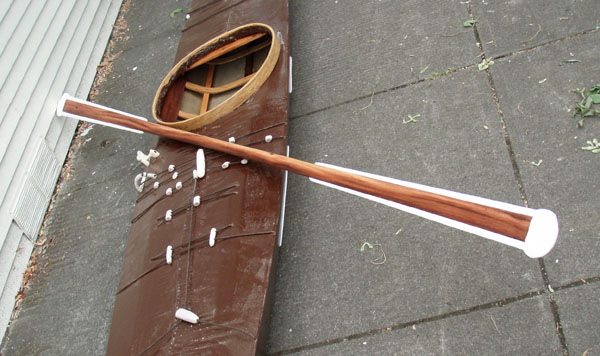
All finished.....