A Sailing Canoe-- Skin-on-frame.
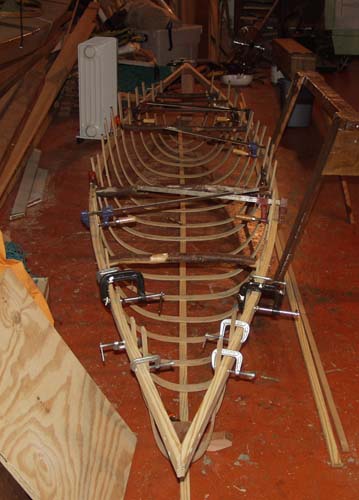
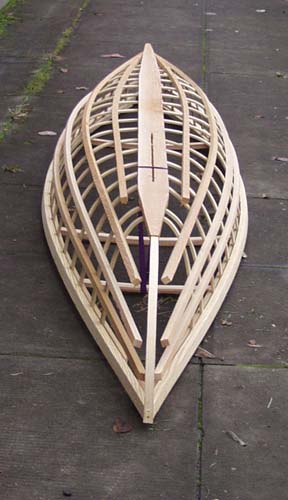
Left: Steam-bending the ribs. I blocked-up the gunwales to the right depth, laid a hot rib across the gunwales,
and then stepped on the rib and walked it into shape. Once the right shape was achieved, I clamped
its ends off to the gunwales. I have temporary spreaders in place (instead of permanent deck beams).
Right:
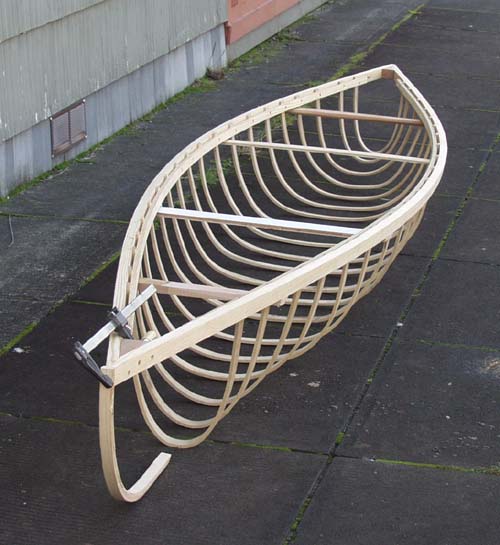
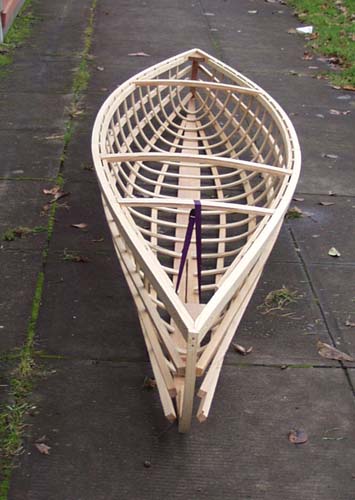
The canoe after the ribs and inwales have been secured. The inwales are fastened from
inside with galvanized drywall screws set through the rib-ends and into the outwales.
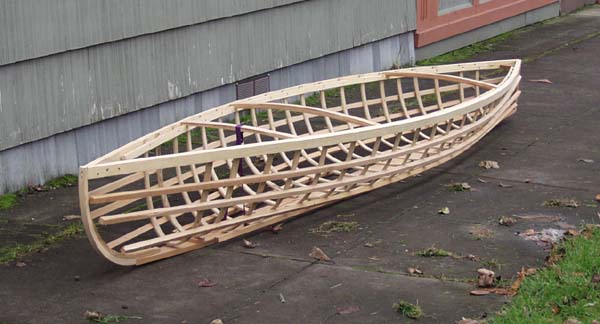
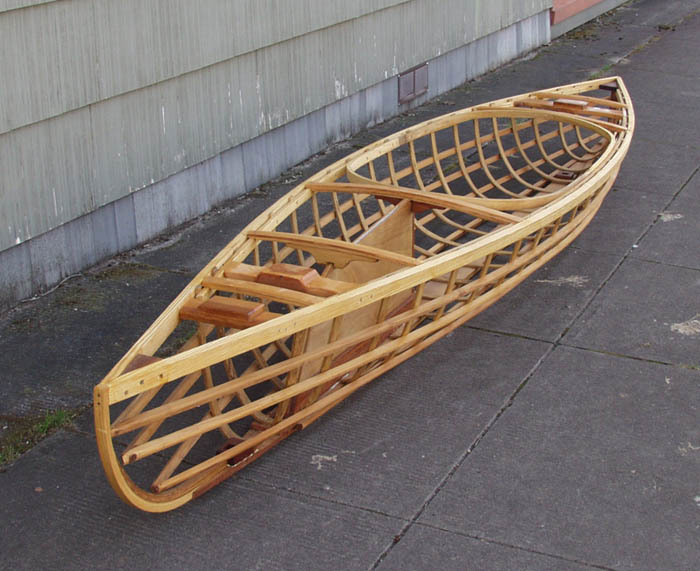
The nearly-completed frame. The chine-ends haven't been brought in yet, and the centerboard
mast-steps, and coaming framing are not yet fitted. The chines are bronze-nailed to the ribs; the
keelson and chines are western red cedar.
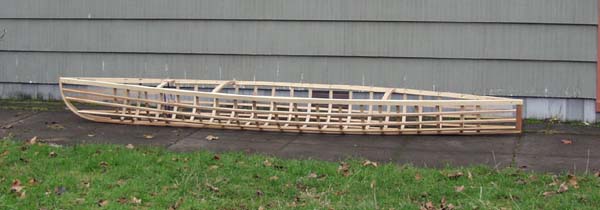
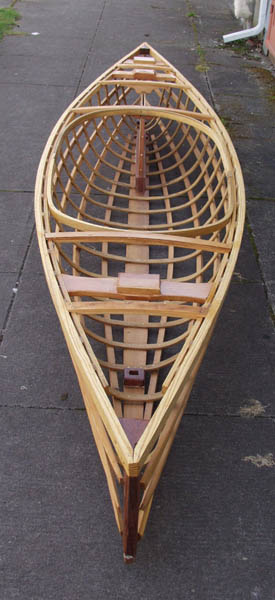
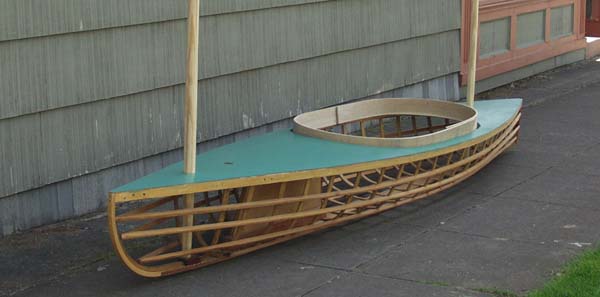
The finished frame!! (March 2006). Three mast-steps and partners in place, and the centerboard trunk.
The two deck beams straddling the trunk have 'knees' to re-inforce the trunk, but they are not
secured to it in any way, thus allowing the trunk to flex fore & aft slightly (as opposed to
causing structural damage.) The round "coaming" is actually the inner-coaming support; the
actual coaming will be about 3" high.
Rear-end view of the finished frame.
Main and mizzen fitted, the deck attached and primed, and the coaming bent and loosely
in place. The coaming will be butt-scarfed with an oak backing piece and fastened
with copper rivets. The next step is to get the skin on the hull.
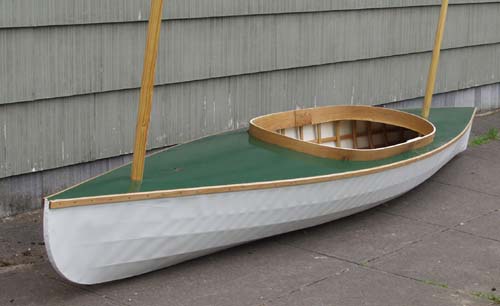
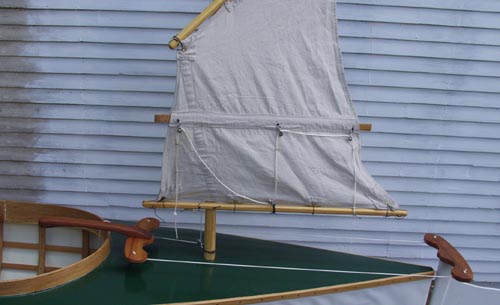
The coaming is oiled, copper-fastened and bronze-nailed to the canoe. The deck has a
proper shade of Green, and the hull has been covered with 12oz. nylon and primed
with two coats of Polyurethane and then painted with 3 coats of Rustoleum. The masts
are varnished and rubrails are fastened to the sheer.
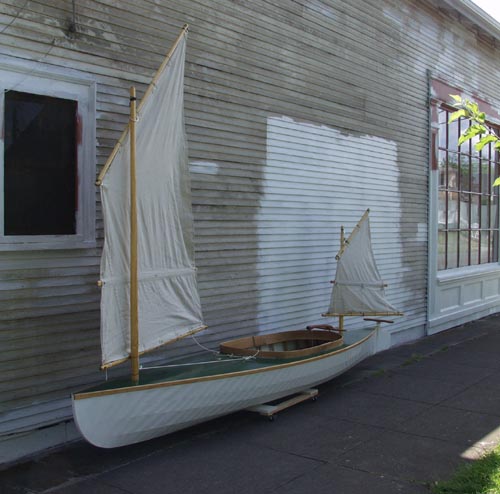
Rigged at last -- mostly. Still for want of sheets and proper parralling. The main
and mizzen are both balanced lug sails and each has a single batten. The
sails are cotton canvas, sewn, grommeted and stitched by myself. I estimate the
hull's weight (sans rig, rudder, and centerboard) to be 55#.
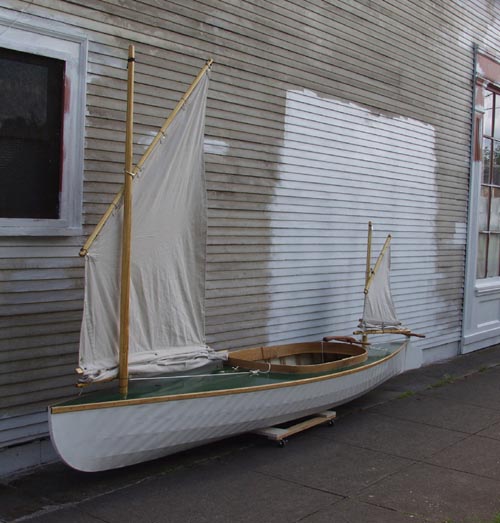
Here's the same view but with both sails reefed. The reefing method is detailed
below; I got it from a late 19th century book generously put on-line in its entirety at
http://www.dragonflycanoe.com/hayward/index.html
The reefing line is plain to see-- threaded through three blocks on the batten
and one on the yard. The line cleats off on the yard just ahead of the mast. Also
note the slave tiller to work around the mizzen.
Launch......
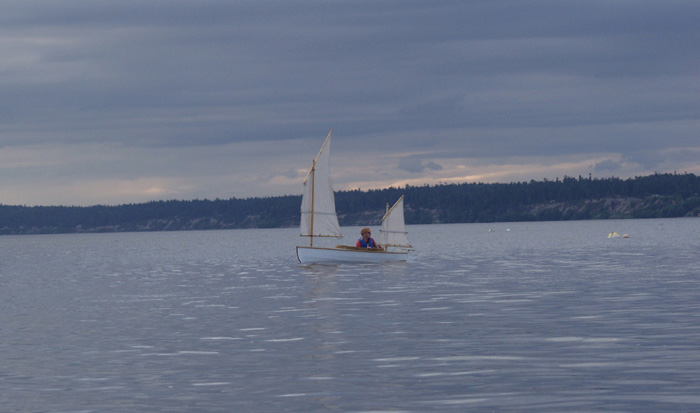
I launched the canoe on June 13th 2006 on Whidbey Island Washington. The air was light that evening,
so things went slowly-- which is the ideal pace for shaky sailor on a shakedown cruise. The canoe sailed
just fine-- a lot tippier than I had imagined, but I quickly got used to it.
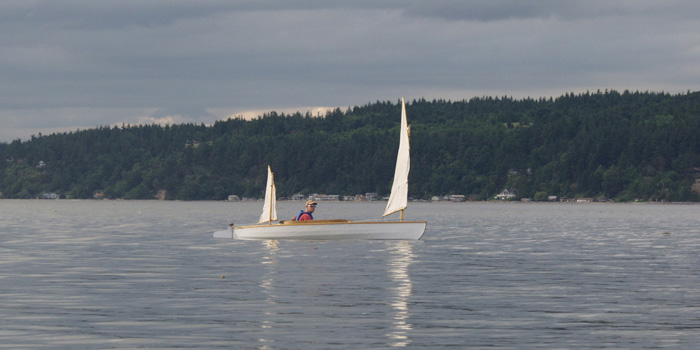
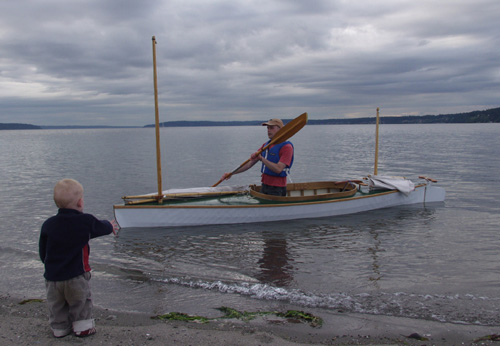
Coming into land after a nice sail. All the rigging worked very well without any hitches. Its a
less-than-ideal paddling canoe, though with its considerable breadth and depth. It paddles well enough
from a kneeling position (as above), although it is quite tippy without ballast. The next day I had
it out in a mild wind and it was very responsive: I sailed it in circles for about an hour just to get the feel for
its handling as well as managing the rigging.
Its been a fun project!